Creating Assets in Blender
When getting ready to export your asset, there are a few things to consider to keep your asset widely compatible, and especially compatible with ANGELWARE avatars. These guidelines can be used for any Modular Avatar asset, and are especially useful when working on an ANGELWARE avatar.
Armature Considerations
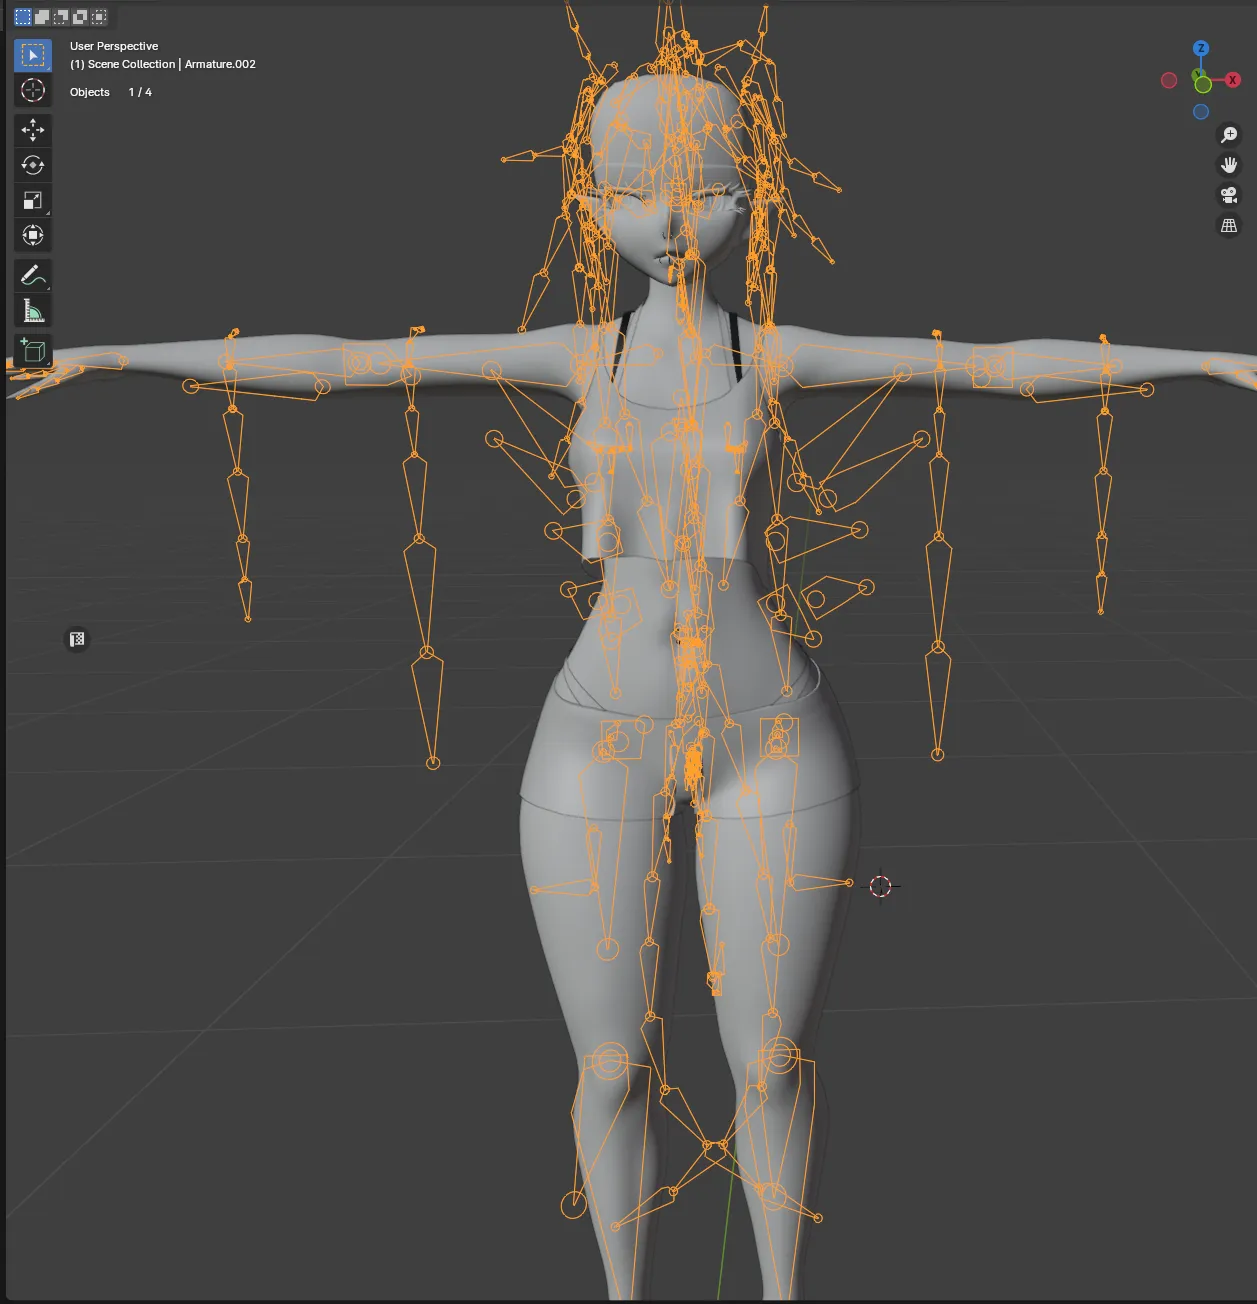
When building an asset specifically for an avatar, you should always try to use the same armature whenever possible. This just makes merging bones much easier within the editor, especially when things are named similarly. As you can see below, I am using the original armature from ANGEL-01. However, there are far too many extra bones for this asset, so I will clean it up.
I am going to clean this up by removing any bone that isn’t useful for this asset. I am making shorts, so all I need are the Hips and Legs, but I will keep the Spine bone as well, just in case there is any extra weight painting that might be useful.
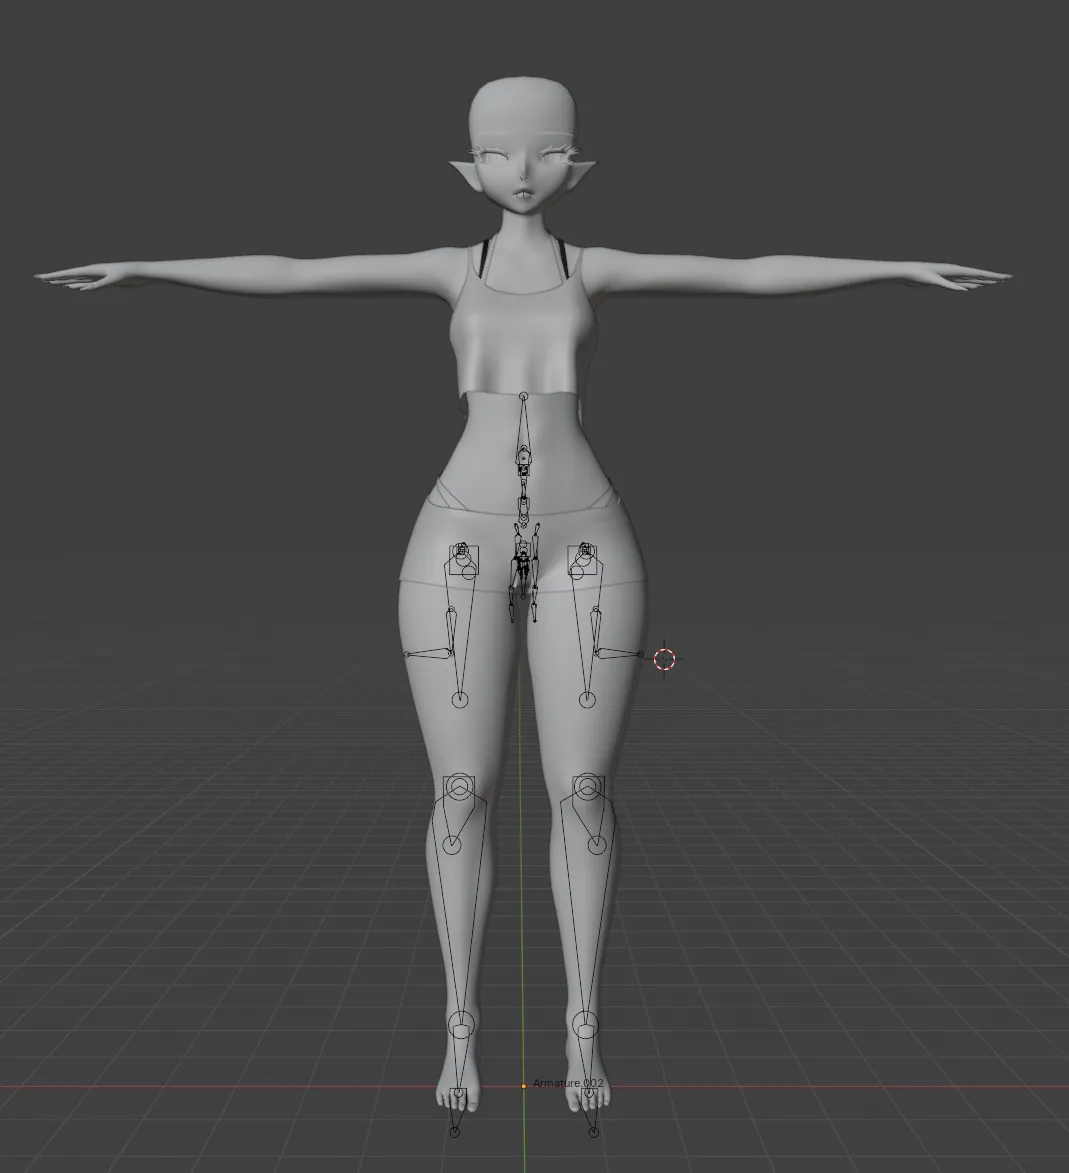
As you can see I have removed all the bones that aren’t useful to this particular asset, as they do not contain any weight, they are redundant. This will also make the process of merging the armatures much faster.
Mesh Considerations
Breast Sliders and Compensation Shapes
ANGEL-01 contains a slider for Breast Bones that must be taken into account when creating your asset, if you choose to be compatible with it. It uses a helper shapekey called _BoobFix that compensates for issues that arise when scaling bones in such a significant way. This isn’t ideal, and is something I want to change in the future, but for now we must create this shape if we want to remain compatible with the avatar.
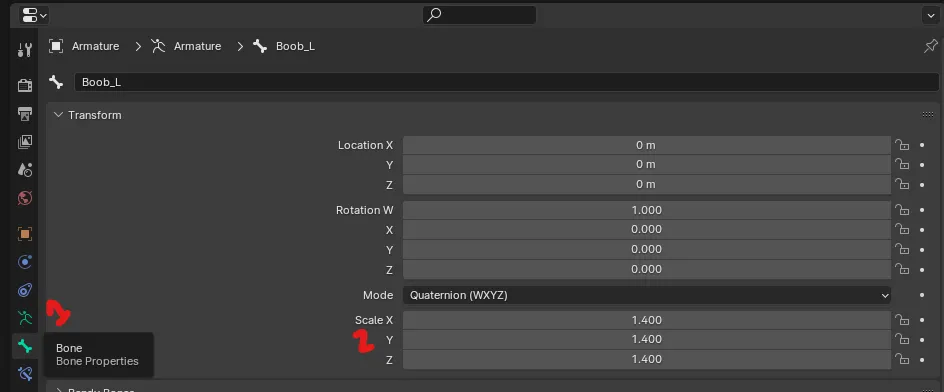
In order to do this, you should scale the bones in pose mode, and create the shapekey with the pose frozen. I will quickly demo how to do this using CATs for Blender.
To scale the bones, use this table:
| Bone | Scale |
|---|---|
| Boob_L | 1.4 |
| Boob_R | 1.4 |
First start pose mode (I am using CATs)
![]()
Next select the bone to scale, enter the bone tab, and scale the bone with the correct XYZ scaling.
After this is done press this button to freeze the pose and enter Object Mode

Now you can sculpt the shapekey as you would with any other shapekey. When scaling bones in Unity now, you should see the Blendshape update as the bone scales.
All of this is necessary because this is how we scale using only bones to keep physics in order. If we were to use a simple Blendshape to make the breasts larger, we would run into issues with smaller colliders and physics that are for smaller breasts. As you scale them up using this system, the breasts bounce, stretch, and squish will all change with the bone length.
Thigh Sliders
Thigh size is handled by a single Blendshape called _Thin. You can use this as a basis for keeping compatibility with our thigh thickness slider.
Other Things to Consider
UV Discards
We have a standard set of UV Discards across our model that you can use to sort out clipping and the like. There is currently no feasible way to add UV Discards to the mesh without modifications, or redistributing the mesh which is against the TOS. (We are working on a solution for this!)
Additional Body Blendshapes
At the moment, we have no method of adding Blendshapes to the model within Unity, but it is a current WIP. We are working on a tool that will allow you to transfer Blendshapes to the original model without redistributing it. However, this is a WIP and the project isn’t publicly available yet. We also have no timeline for this, so please treat it as not-possible for now.
Changes to the Base Model
Any other changes will require you to instruct your users on how to do so. Redistributing the original model in any form is not allowed.
Exporting
Please see the next page, Exporting Assets