Creating Prefabs
This guide will roughly go over how to create a Modular asset for the ADK or any Modular avatar. It’s universal, minus the specific parts geared towards ANGELWARE components. Creating a prefab for ANGELWARE avatars is very similar to a workflow you might use while creating assets for a Booth avatar, for example.
When creating a prefab for the ADK we have 3 main components, along with any animators you may have. For this we will mostly be using modular avatar, with a few homegrown scripts.
For modular avatar parts, you can view the official Modular Avatar documentation on how to use them further than I have described here.
Creating Toggles for your Asset
There are two primary ways to create animations for your asset. For simple toggles, we highly recommend using the first method using the AW_AssetComponent, as it will allow you to easily integrate your toggles within the ADK, allowing users to quickly set default states for their model. If you need more complex animations, further than simple dissolves, radials, etc, use the second option with MA’s Animator Merger.
Using the AW_AssetComponent to generate toggles and radials
This can be slightly confusing at first, but I prefer to keep everything directly in front of you, rather than hiding it behind tutorials and tooltips. If you get lost, feel free to refer to the component’s reference page for more detailed information.
Creating a menu accessible toggle is much simpler than it looks. To do this we will demo creating a simple UV Discard Dissolve toggle within our asset’s material. The same process is used for sliders as well as Blendshapes and other toggle types. At this time colour field animations are not supported but are planned for the future.
First, create an AW_AssetComponent on the root of your asset. This will be used universally for both creating toggles and for the ADK to both identify your asset and create toggles within the ADK for setting default states.
Next, create a new toggle by expanding the Toggles foldout and pressing the plus (+) to add a new option.
For this toggle, I want to create a simple dissolve that works both in-game and within the ADK. Since this will be a clothing toggle, it will also be synced and saved.
Before I do anything, I need to set the name of my asset in the Asset Header if I want it to show up in the ADK, and also set my Asset ID to something unique if I want it to be addable via the ADK’s features menu. Both of these do not need to be present to work, so add them for your specific use-case.
- I will select
Show in ADKto show my toggle in the ADK’s Customization menu. - I will leave the
User ValueasOnbecause my shorts are still visible in the editor. If I were to disable this, it would invert the control within the ADK, which I do not want. This will also be the default value for users who first load the asset. - This will be a parameter I want other users to see in-game, so I will check the boxes
Exposed Parameter, to create the parameter in the VRCExpressionsParameters,Parameter Syncedto sync the parameter across the network*, andParameter Savedto keep track of the user’s preference between worlds and spawns. - I will enter a parameter name “ComfyShorts”, note that this will be prefixed with
Menu/so the final parameter that I will use in my menu will beMenu/ComfyShorts. - Next I will add the Material Toggle Itself. Note that the ADK supports multiple options per toggle, so I can have multiple Material Toggles, Blendshape Toggles, and Object Toggles all on the same menu option.
- After creating a new Material Toggle, I will set the Game Object to the mesh of my asset. This is used for creating the animation. I will then set the material of my asset that I want to change.
- Next we need to get the property we want to change. In Poiyomi, this is super easy. We just right-click on the title of the property and
Copy Property Name
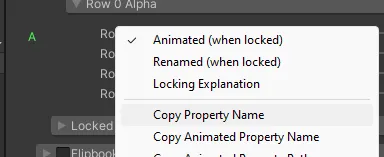
Now paste this value into the Property box, and set your minimum and maximum values accordingly.
8. You may set the Disable Parameters list to contain any parameters you may want to disable when enabling the asset. For example, if I wanted to disable the default top, I would add the parameter “Top” (without the “Menu/” prefix) to this list.
9. Finally, you can check the Clamp Breast Physics option, if your asset contains something like a bra or top that would normally make the physics tighter when wearing.
10. For more information on dealing with breast size and thigh size, please see this article
//TODO: Add this article!
This all may seem daunting at first, but eventually it will become second nature when working on this avatar.
Here is what my final result looks like:
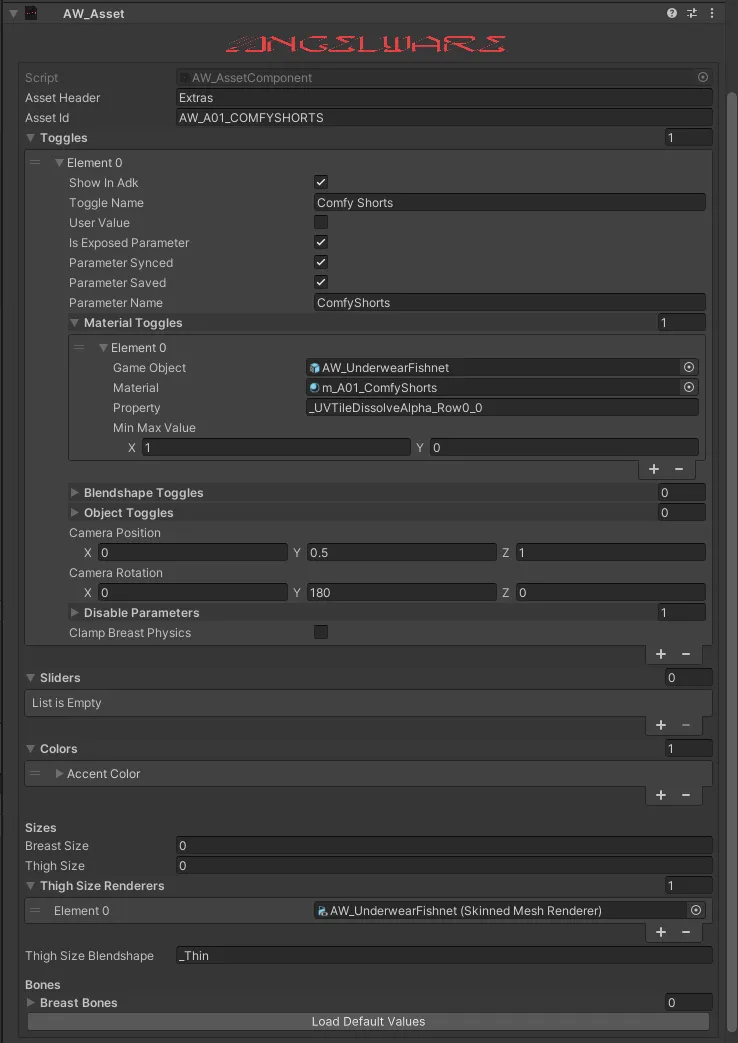
I can use the parameter Menu/ComfyShorts in my menu to turn this object on and off, and it also appears in the ADK with both a toggle and an accent color option!

Using a Modular Avatar Animator Merger
For this option, instead of using the AW_Asset component, we will just use a standard Unity animator with the Modular Avatar Animator Merger component. As this is only really necessary for complex animators, I will assume you know somewhat what you are doing here.
The main thing to keep in mind is you do not want to add any layers that the default avatar already contains. You will be creating a completely seperate animator, and merging that into the existing one.
You can read more about this in the official Modular Avatar documentation.
Merge Armatures
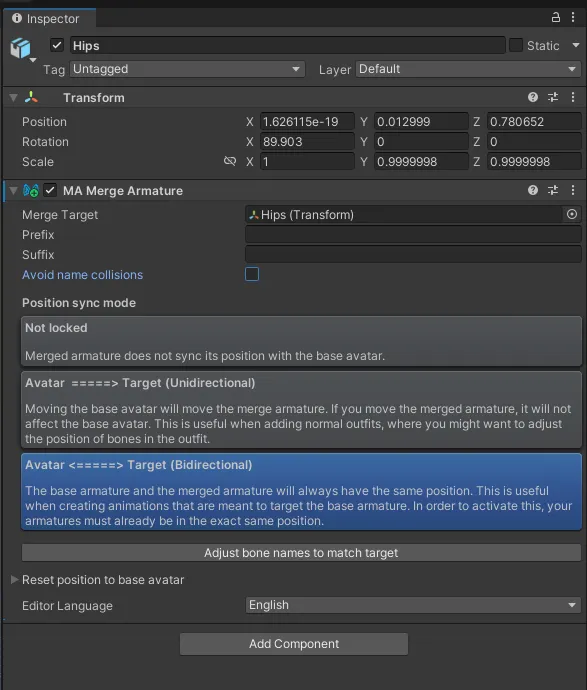
For this, we will merge the armature using the hips of the avatar / asset. Place an “MA Merge Armature” component on the hips of the prefab, and reference it to the avatar’s hips. In most cases these settings are fine, but there may be situations where avoiding name collisions is necessary, but this is rare, and un-performant, it should only be used if there is a real reason to.
Most of the time Bidirectional merging is what you will use, especially when using the AW_DummyRig.
Please view the official docs for more info.
Menu Installer
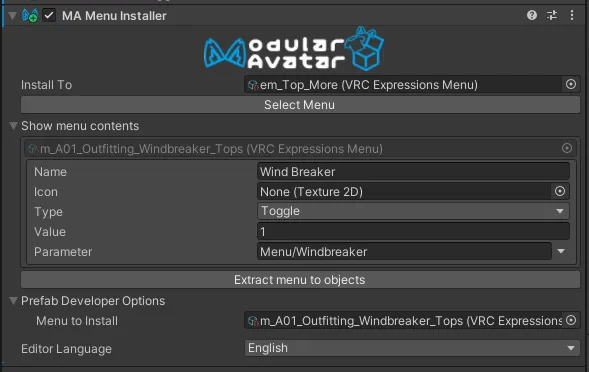
Next, we will add an MA Menu Installer component to the root of the prefab. To use this component, select the menu you would like to install to, then add your VRC Expressions Menu asset to the Prefab Developer Options > Menu to Install box.
For more info on this component please check the official MA docs.
 ~~
~~